
DIY Personalized Stocking Hang Tag


This post may contain paid ads and affiliate links from which, at no additional cost to you, I may earn a small commission. Read the full disclosure here.
Hey guys!
I looked everywhere for simple personalized stocking tags this year and couldn’t find anything I liked at a decent price so of course I decided to make some.
I used all scrap material I had laying around, but if purchased all together this project comes out pretty cheap.
What you need for this project:
Ribbon
That’s it!

First thing I did is cut my poplar board. I took one end and cut two 45 degree angles to make a point. Then I cut the tip of the point off to get my shape. Then I just drilled a hole at the top! See the illustration to the left.
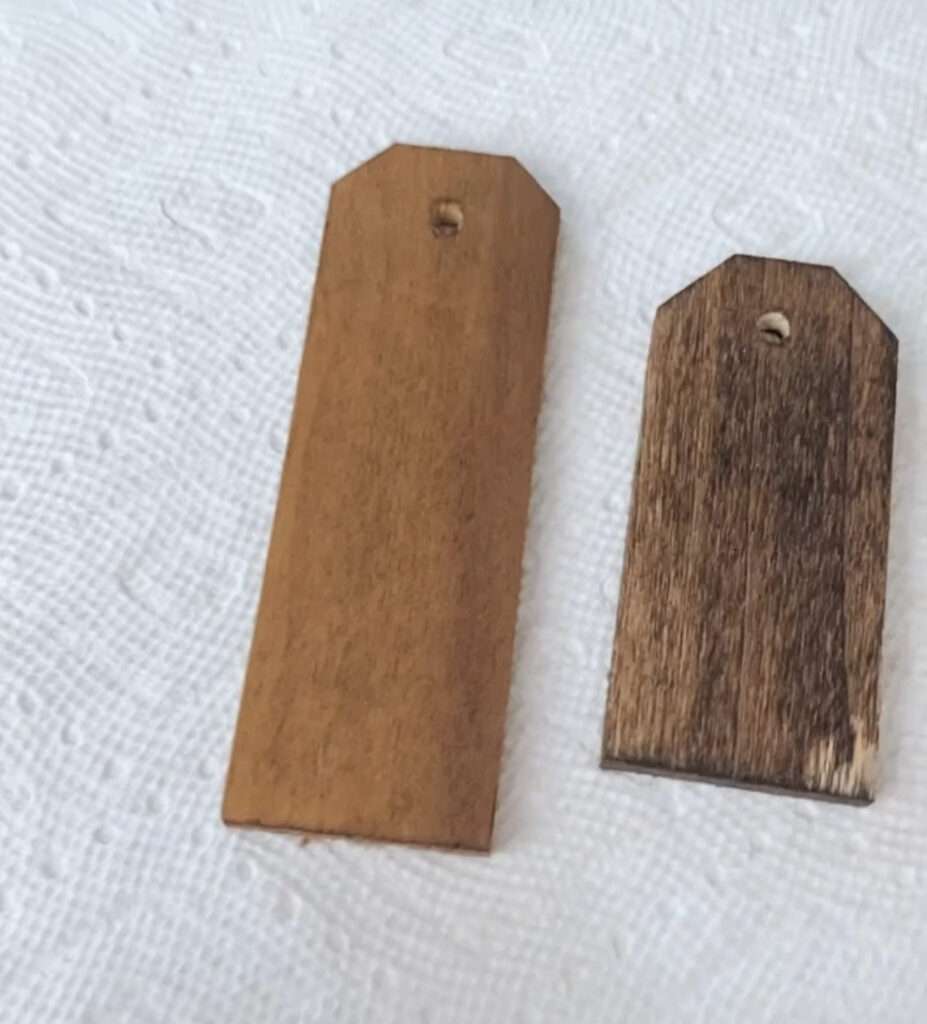
Next I stained the wood. I used a wood conditioner before staining my wood. This isn’t necessary but stains come out differently when you use the conditioner VS not using it. I wanted a more even look. Without the conditioner you get a grainier look. The photo on the right shows the difference – The left tag has wood conditioner and the right does not.
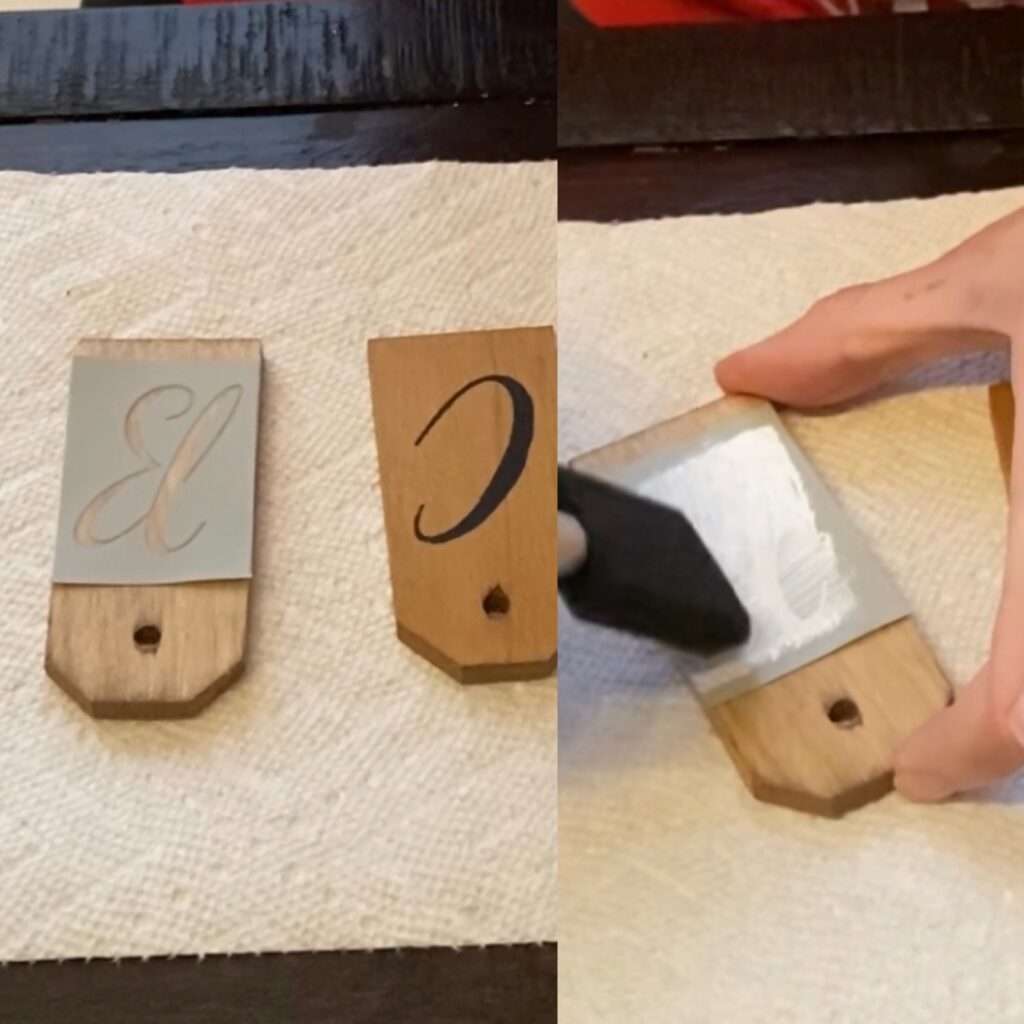
Once the stain is dry I used my stencil to paint on the initials. You can also do the full name if you prefer but I wanted to go with simple initials.
And last I pulled the ribbon through. You can do the ribbon however you’d like. Here I showed 3 different ways to tie it.
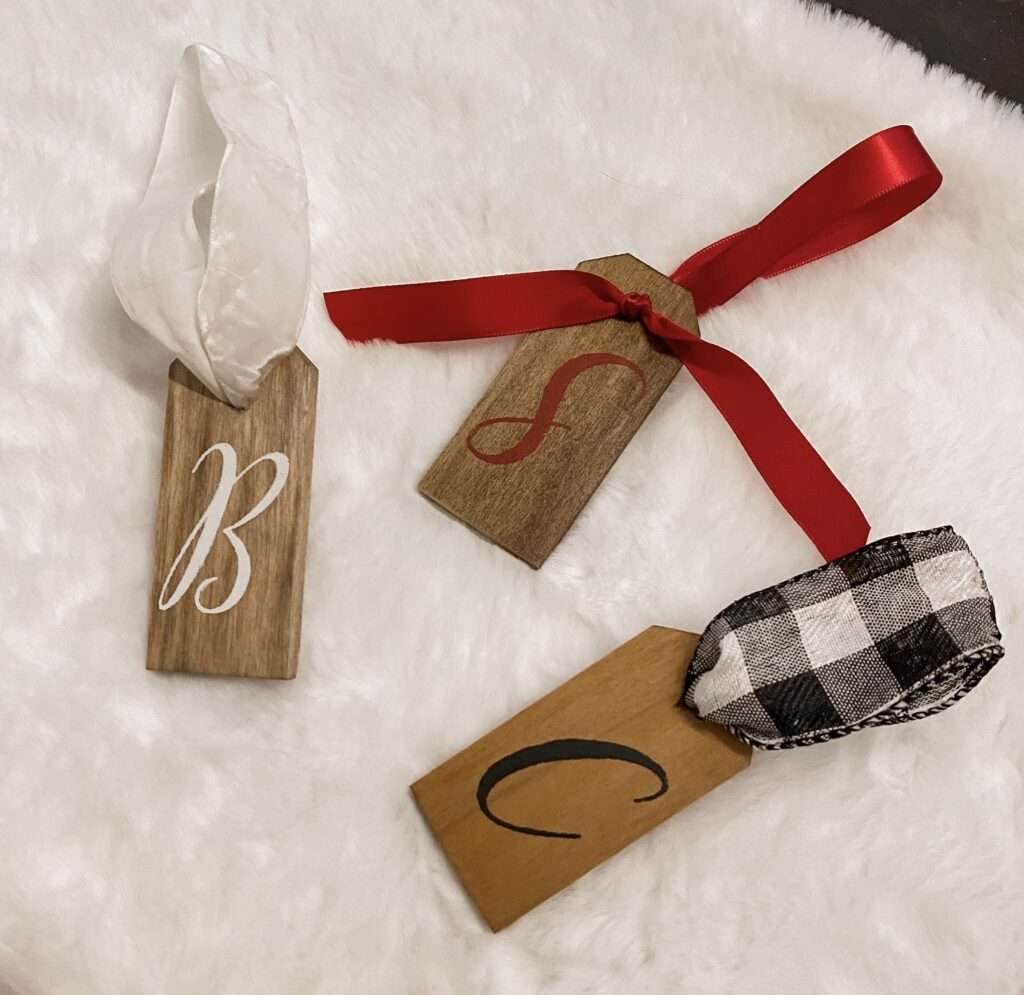
That’s it! You’re done! Follow along for more DIY tutorials or checkout my instagram @designingparkside for daily DIY tips!


